Connect to Portal
OmniSpatial can load, view, and save content from ArcGIS Portal. If you would like to consume secured content from Portal within Omni, then Omni must be configured to authenticate with your ArcGIS Portal instance. The following guide will walk you through the process of connecting your ArcGIS Portal environment to OmniSpatial.
NOTE: The same steps can be followed to authenticate data from ArcGIS Online.
Create ArcGIS Portal Application
-
Go to the
Contentpage in your ArcGIS Portal instance. -
Click the
New Itembutton. -
Click the
Applicationoption.
-
Chose
Application typeofWeb mappingand enter the URL to OmniSpatial.- ex:
https://omni.rizing.app
- ex:
-
Click
Next. -
Add a title for your application (ex: OmniSpatial Application) and fill in any other details.
-
Click
Nextto create the application. -
Click
Settingsin header bar for the application page.
-
Scroll to the bottom and click the
Registerbutton to register the app and generate an App ID. -
Ensure the
App Typeis set toBrowser -
Enter the OmniSpatial URL in the
Redirect URIinput and hitAdd.- ex:
https://omni.rizing.app
- ex:
-
Click the
Registerbutton. -
Copy the
App IDfrom under theApp Registrationinfo section.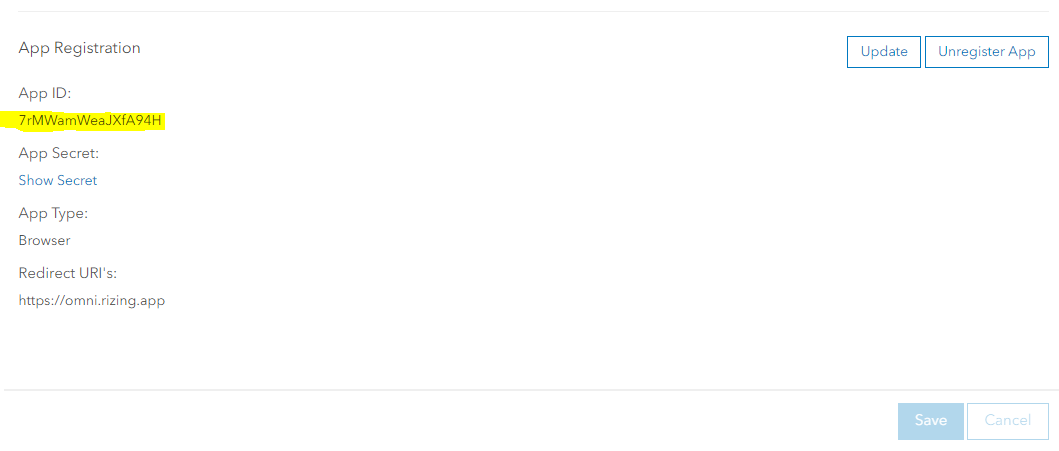
Add Secured Services Configuration
In order for Omni to know how to authenticate requests to your ArcGIS Portal and federated ArcGIS Server services, a "Secured Services" record must be added within Omni. The following steps will walk you through the process.
-
Go to the OmniSpatial application.
- ex:
https://omni.rizing.app/your-org
- ex:
-
Go to
More>Advanced>Manage Secured Services.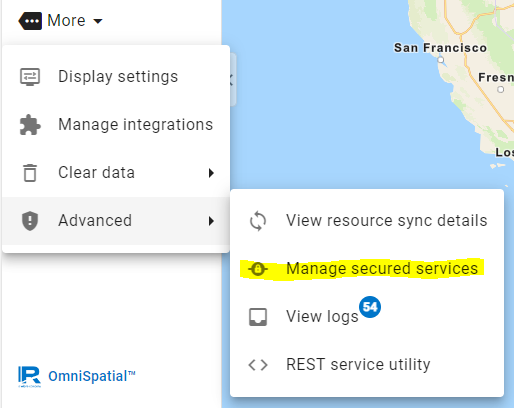
-
Click
Newin the bottom right corner of the dialog. -
Enter a name for the service(s) you are setting up authentication for
- ex: "Your Org's ArcGIS Enterprise"
-
Select a
Service TypeofArcGISPortal -
Enter a
Authorization URLto Portal as https://YOUR_PORTAL_URL/sharing/rest/oauth2/authorize- ex:
https://my-domain/portal/sharing/rest/oauth2/authorize
- ex:
-
Enter the
Client ID, which is theApp IDcopied from theApp Registrationinfo section from the last step in the Create ArcGIS Portal Application section.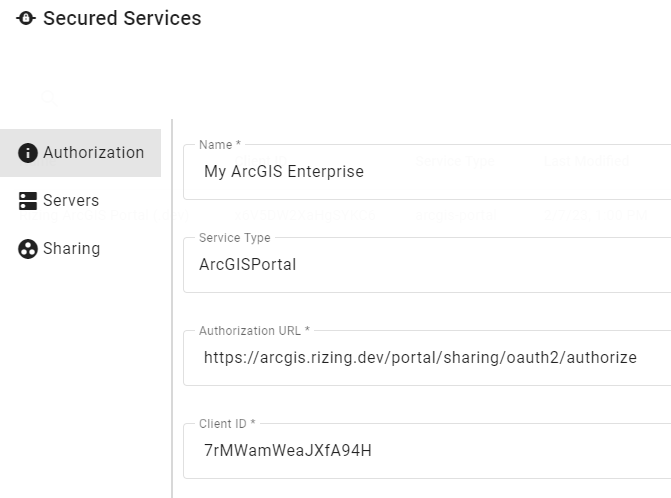
-
Click the
Serversoption from the left options menu. -
Click
Add Resource. -
Enter the root URL to your Portal instance.
- ex:
https://my-domain/portal
- Enter the root URL to all ArcGIS Server instances that are federated with the Portal instance.
- ex:
https://my-domain/server1 - ex:
https://my-domain/server2 - NOTE: a list of all ArcGIS Servers federated with Portal can be found at
Your ArcGIS Portal>Organization>Settings>Servers

- Click the
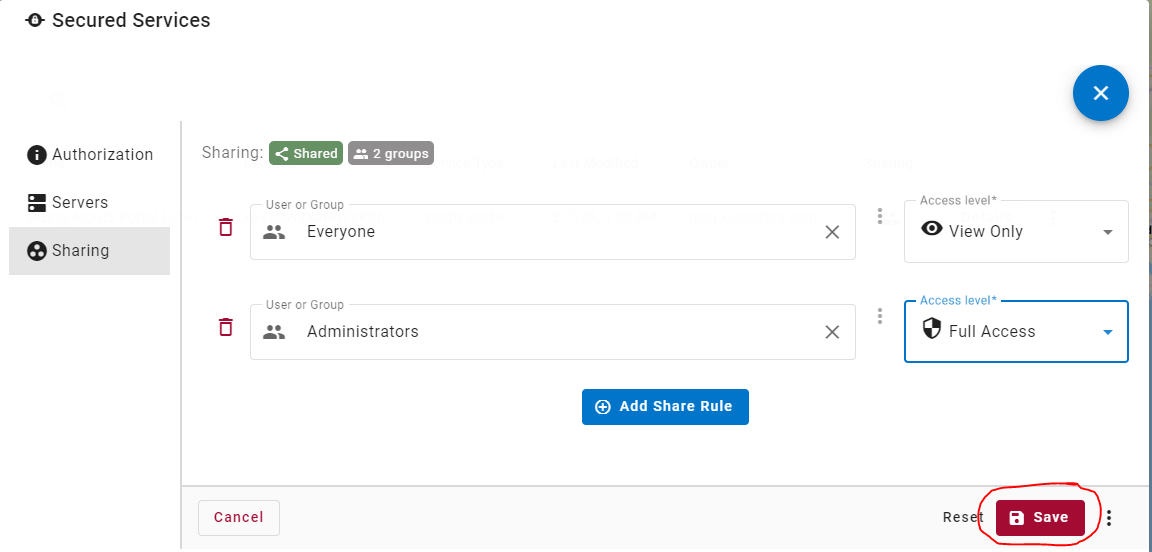
Sharingoption from the left options menu. - Click
Add Share Rule. - Enter the group of people you would like to share this Portal authentication configuration with. Typically this would be shared with everyone in your organization.
- ex: "Everyone"
- Select an
Access LevelofView Only(unless another configuration is desired). - If you'd like to allow other admins to manage this configuration, click
Add Share Rule. - Enter your
Administratorsgroup (or whatever group you'd like to share ownership with).- ex: "Administrators"
- Select an
Access LevelofFull Access(unless another configuration is desired). - Click the
Savebutton